Memory Lane Therapy Presents Dream Catcher Activity for Seniors! Get ready for a delightful adventure with dream catchers! These whimsical wonders are perfect for seniors seeking a crafty escape into a world of magic and dreams. Handcrafted with love, are believed to bring only the sweetest dreams while keeping nightmares at bay.
Engage seniors with a captivating Dream Catcher activity that promotes relaxation and unleashes creativity. Discover step-by-step instructions and meaningful benefits of this therapeutic craft for older adults. Make cherished memories while crafting beautiful dream catchers together
Click the link at the bottom of this article for the A4 printable version.
Materials Needed for the Dream Catcher Activity
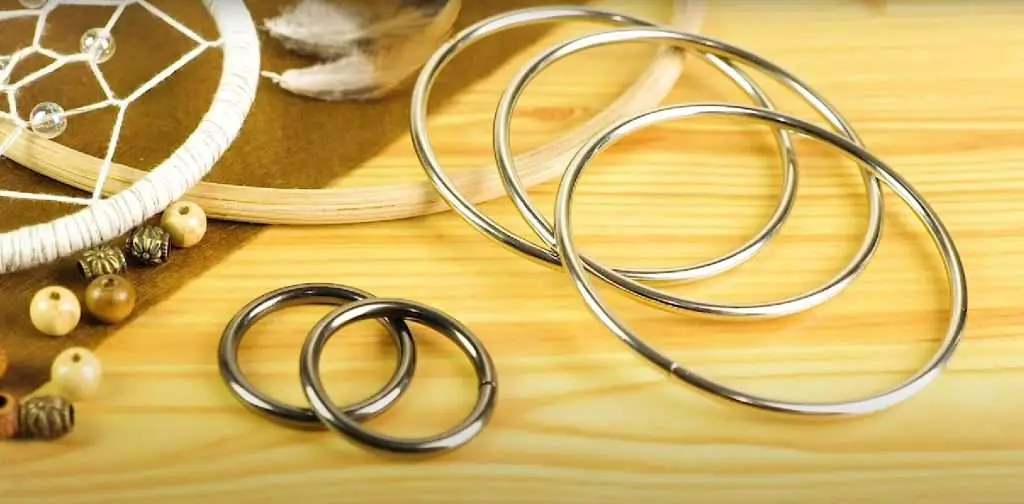
1.Hoop or circular frame (can use an embroidery hoop or a sturdy cardboard cutout)
2.Yarn or string (soft and colorful material works best)
3.Beads (plastic or wooden, various colors and sizes)
4.Feathers (a mix of different feathers adds charm)
5.Scissors
6.Glue (optional, for securing the end of the yarn)
7.Decorative elements (ribbons, small trinkets, or charms)
Dream Catcher Activity Instructions
1. Prepare the Hoop
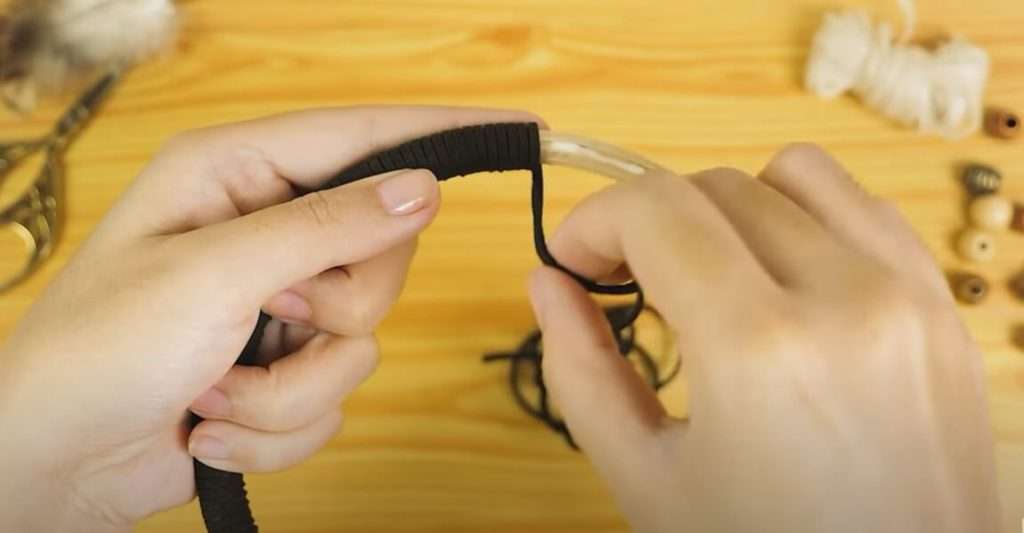
Hold the hoop with both hands and begin wrapping the yarn around it. Make a secure knot to start, leaving a tail of yarn hanging. Wrap the yarn around the hoop tightly, covering it entirely, until you reach the starting point again. Tie another secure knot to finish, leaving another tail of yarn.
2. Form the Dream Catcher Webbing
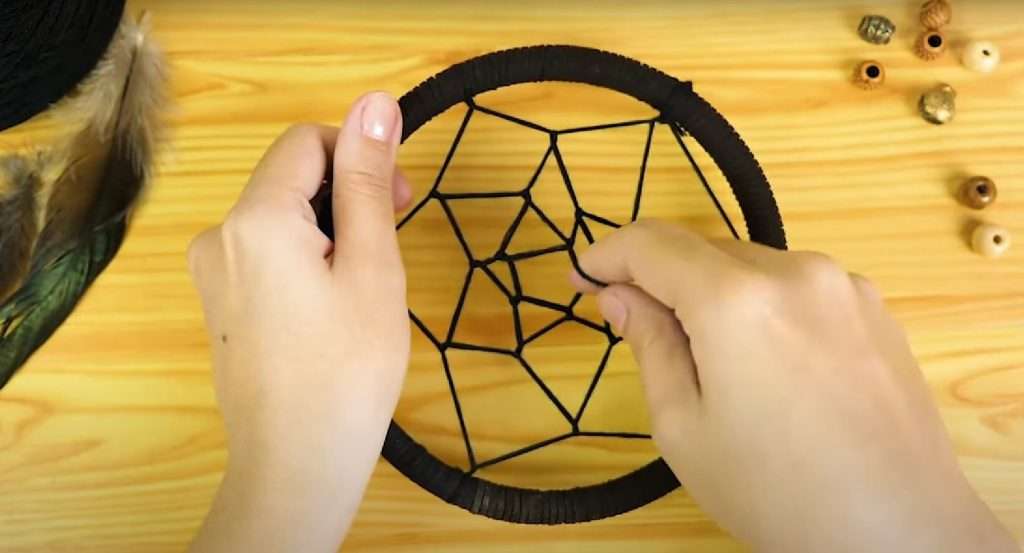
With the yarn-covered hoop in front of you, tie a knot at the starting point. Leave a small space (about 1 inch) and make another knot. Repeat this process until you have several knots around the hoop, creating equal spaces between them. This will form the webbing of the dream catcher.
3. Add Beads and Feathers
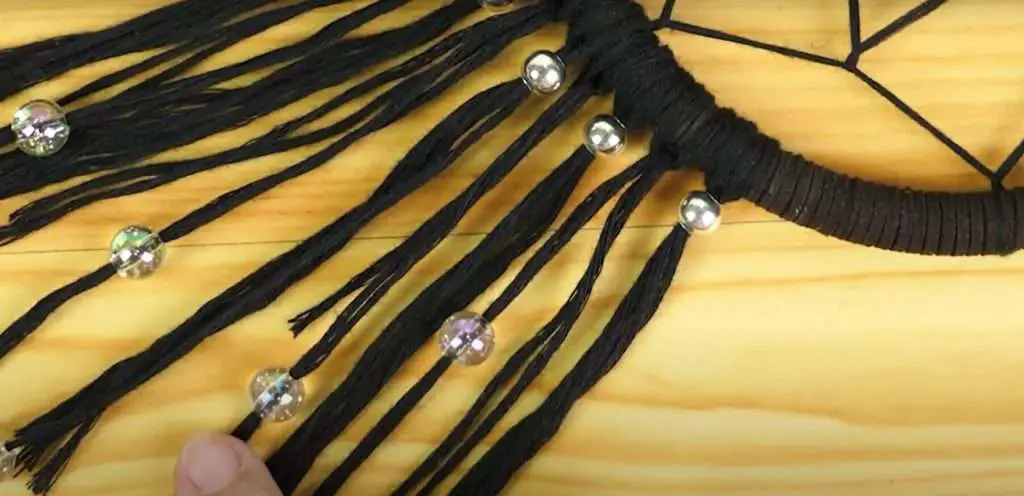
Thread beads onto some strands of yarn, and tie them securely to the bottom of the dream catcher, spacing them as desired. You can also add feathers by tying them to the bottom, creating a decorative fringe. Allow some beads and feathers to dangle freely for a whimsical touch.
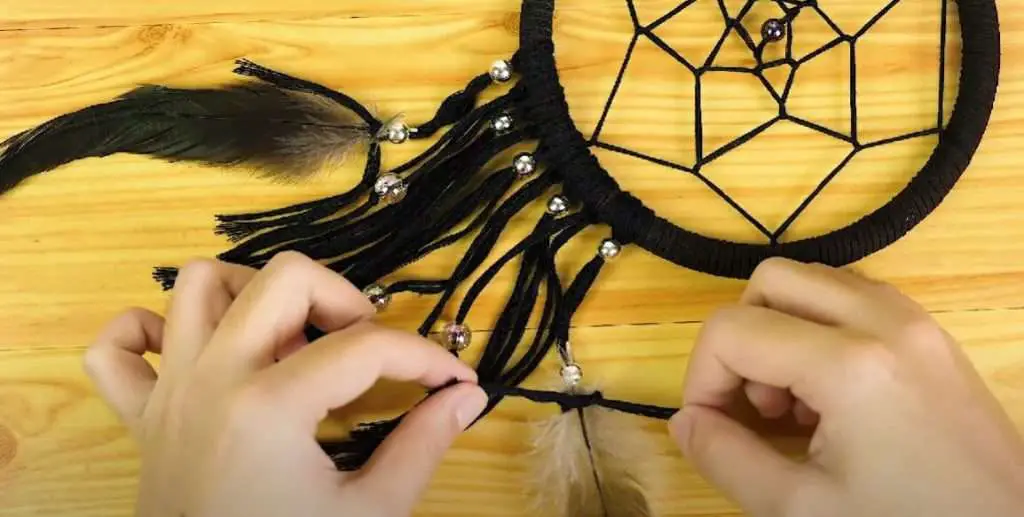
4. Personalize and Decorate Time to get Creative
Get creative! Use ribbons, small trinkets, or charms to personalize the dream catcher further. Attach them securely to the bottom of the dream catcher or incorporate them into the webbing for a unique touch.

5. Hang and Enjoy
Your dream catcher is now complete! Find a special spot to hang it – by the bedside or near a window. As you gaze at your dream catcher, remember that it’s believed to catch bad dreams and allow only good dreams to pass through, ensuring peaceful sleep. Remember, the joy of making a dream catcher lies in the process itself. Take your time, enjoy the craft, and embrace the creativity it brings. Happy crafting!
Conclusion
Congratulations! You’ve successfully crafted a beautiful dream catcher, tailored to your unique style and creativity. Embrace the sense of accomplishment and joy that comes with creating something so special with your own hands. As you hang your dream catcher in its designated spot, take a moment to appreciate the care and effort you put into making it.
Remember, your dream catcher is not just a decorative piece; it holds a deeper significance – the promise of peaceful and pleasant dreams. Let it watch over you as you sleep, catching any worries or fears, and allowing only the sweetest dreams to find their way to you.
Download a Copy of the Instructions
As a bonus, we are providing you with a free Downloadable Copy of the instructions from this post! Make sure to print the PDF File and distribute it you your aged care staff and to your beloved seniors.


