Hand a resident a snow globe and watch what happens. They shake it, hold it up to the light and go quiet for a moment while the snow settles. Then the stories start: the one bought on a seaside holiday, the one on Nana’s mantelpiece, the one that leaked all over the good tablecloth.
This snow globe craft turns a clean jam jar, a little figurine and a spoonful of glitter into a keepsake residents can shake, watch and give away. Staff do the gluing and sealing, residents choose the scene, spoon in the snow and give it the first big shake. I’ve run it every December for years, and someone always asks to make a second one for a grandchild.
There’s a free printable guide with the steps, actual-size base circles and gift tags at the bottom of this page, plus a short video you can play to the group before you start.
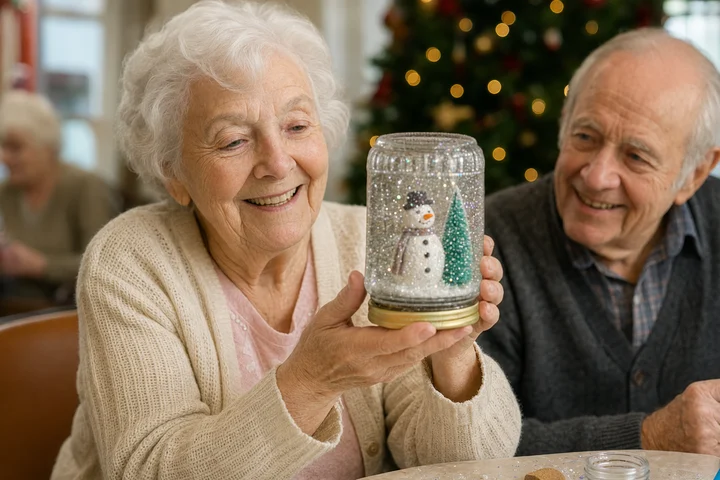
Why this activity works well
- Calming to watch: Glitter drifting through water is soothing, especially for people living with dementia.
- No wrong answer: Any figurine, any scene, any amount of snow looks lovely.
- Everyone has a job: Choosing, arranging, spooning and shaking all count, so mixed abilities share one table.
- Cheap and recycled: Jars from the kitchen, figurines from a discount shop, glitter from the craft box.
- A real gift: Residents are proud to give a globe to family or keep it on their windowsill.
- Works all year: Swap the snowman for an Easter chick, a pumpkin or a wedding couple.
A short note on snow globes
Snow globes are thought to have started in France in the 1800s as glass paperweights filled with water and white flakes. By the time our residents were children they were everywhere: souvenirs from the seaside and the big city, prizes at the fair, and a little treasure on the shelf at Christmas. Most people remember being told not to shake Nana’s one too hard. That shared memory is why this craft gets people talking so quickly.
💡 Debbie’s tip: Make one globe the day before and put it in the middle of the table. A quick shake explains the whole activity better than I ever can, and it gives anyone who’s unsure something to hold while they decide whether to join in.
At a glance
| Time | About 30–40 minutes, plus overnight drying for the glue (easiest over two short sessions) |
|---|---|
| Group size | 1:1 or small groups of 4–6, with one staff member on the glue |
| Skill level | Easy. Staff glue and seal; residents choose, arrange, spoon in the glitter and shake |
| Best for | December and winter, Christmas gift-making, sensory sessions, seasonal theme days |
Free Printable Snow Globe Craft Guide
Three landscape pages that print on A4 or US letter (8½ × 11 in). Choose Actual size / 100% in your printer settings so the circles fit your lids.
- Page 1, how to make it: a “You will need” list, seven numbered steps and a quick-sizes box to keep in the middle of the table.
- Page 2, base circles and gift tags: snowflake circles to glue under the lid in 6.5 cm (2½ in), 7.5 cm (3 in) and 8.5 cm (3⅜ in), plus “Shake me!” gift tags.
- Page 3, the session card: adaptations, safety reminders and conversation prompts.
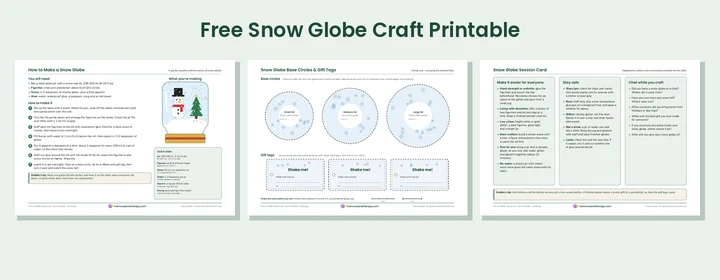
Scroll down to the download section below to get your free copy of the guide.
What you’ll need
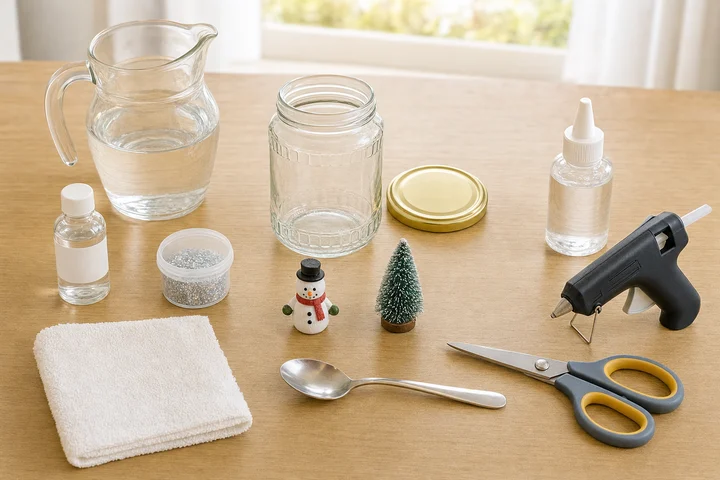
- A clean glass jar with a screw-top lid, about 250–500 ml (8–16 fl oz) and 9–12 cm (3½–5 in) tall. Jam, sauce and baby food jars are perfect. Use a sturdy plastic jar for anyone who might drop it.
- A small waterproof figurine in plastic or glazed ceramic, no taller than two-thirds of the jar (about 6 cm / 2½ in). Mini bottle-brush trees, cake toppers and little animals all work.
- Chunky glitter or flakes, 1–2 teaspoons per jar. Silver and white look most like snow.
- Glycerin (vegetable glycerine) to slow the snow. Clear liquid glue works too.
- Water: distilled, or tap water that’s been boiled and cooled, stays clearer for longer.
- Waterproof craft glue or two-part epoxy (staff use). A low-temperature glue gun is quicker but doesn’t last as long under water.
- A teaspoon, a small jug, an old towel or tray, and ribbon for the lid
- Optional: the free printable on A4 or US letter (8½ × 11 in) for base circles and gift tags
💡 Debbie’s tip: Ask the kitchen and families to save jars a few weeks ahead. Soak the labels off in warm soapy water, then leak-test every one: fill it, screw the lid on and hold it upside down over the sink. If it drips, it goes in the recycling, not on the craft table.
Step by step
1. Set up the table. Lay a towel down first, because there will be drips. Give each person a clean, dry jar and lid, and put the figurines in a little bowl in the middle so people can pick them up and choose.

2. Arrange the scene on the lid. Turn the lid upside down. The inside becomes the floor of the snow globe. Let the resident move the figurines around until they’re happy, then pop the jar over the top to check it fits. Leave about 1 cm (½ in) clear around the edge so the lid still screws on.
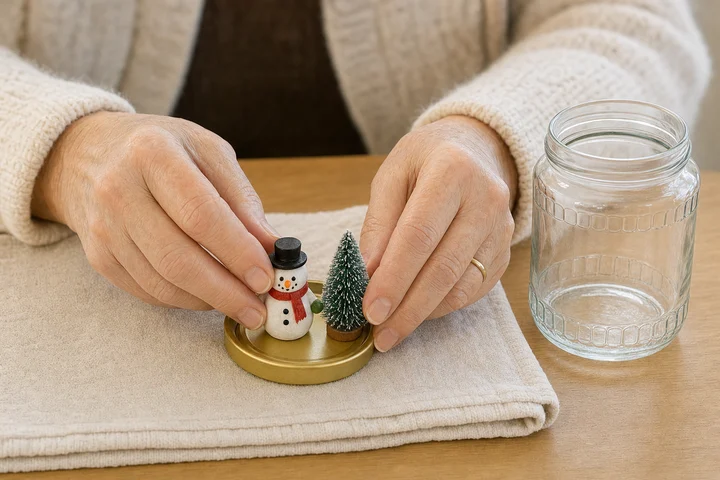
3. Glue the figurines down. A staff member glues each piece firmly with waterproof glue while the resident holds the lid steady. Hold for a slow count of twenty. Waterproof glue is best left overnight, so I glue at the end of one session and fill the jars the next day.
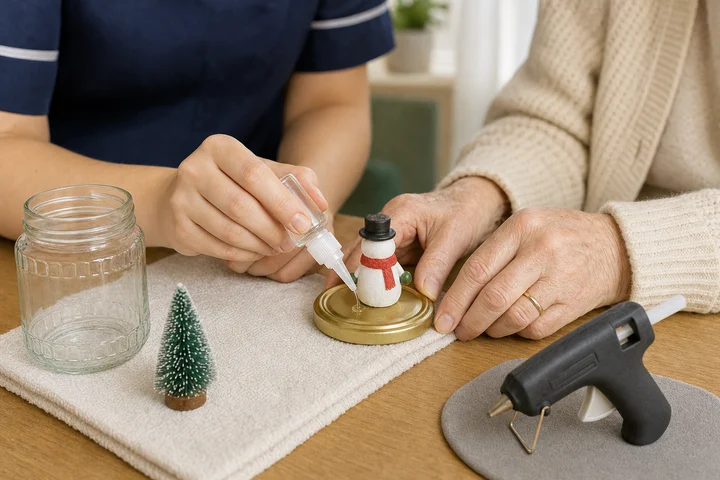
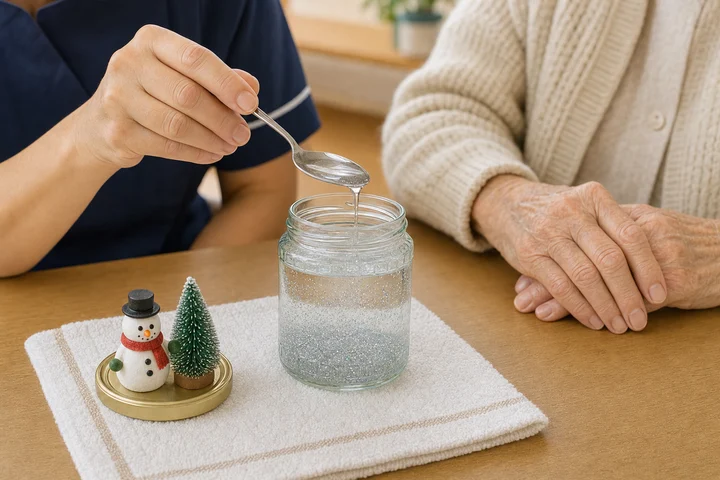
4. Add the water and glitter. Fill the jar with water to about 1 cm (½ in) below the rim, because the figurine pushes the level up when the lid goes on. The resident spoons in 1–2 teaspoons of glitter. It doesn’t matter which goes in first. This is the part everyone loves, so let them take their time and choose their colours.

5. Slow the snow with glycerin. Stir in glycerin a teaspoon at a time, starting with about 1 teaspoon per 250 ml (1 cup) of water. More glycerin means slower snow, but too much turns the water cloudy. Stop when the glitter drifts down nicely.
6. Seal the lid. Staff run a thin line of waterproof glue around the rim of the jar and the inside edge of the lid. Lower the figurines slowly into the water, screw the lid on as tight as it will go and wipe away any overflow. Leave it standing on its lid overnight before anyone shakes it hard.

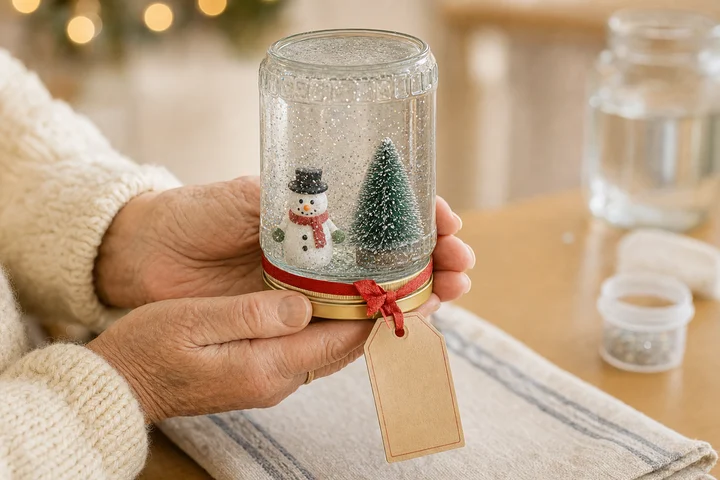
7. Decorate, shake and share. Tie a ribbon around the lid, glue a base circle underneath so it won’t scratch the furniture, and add a gift tag with the maker’s name. Then turn it over and watch the snow fall.
Making it easier for everyone
- Limited hand strength / arthritis: Glue the figurines on beforehand and loosen every lid. Residents choose a jar, spoon in the glitter and pour water from a small jug. A jar on a non-slip mat won’t wander.
- Dementia-friendly: Show the finished sample first. Offer two figurines, not a whole bowl, and one step at a time. Hand-under-hand works well for spooning glitter.
- Low vision: Bright white or gold glitter against a dark figurine, a bigger jar and good table lighting. Describe each step as you do it.
- Keen crafters: Build a whole scene on the lid with a tree, a figure and polymer-clay snow, or paint the lid before you start.
- Bedside or 1:1: Bring a jar that’s already glued and dry. A carer or caregiver adds the water, glitter and glycerin with the resident in about 15 minutes.
- No-water version: If glass or water isn’t right for someone, fill a plastic jar with cotton wool snow and a figurine. Same scene, no spills.
Keeping it safe
- Glass jars: Check every jar for chips and cracks. Use sturdy plastic for anyone with a tremor, a weak grip or a habit of knocking things over.
- Glue: Staff only. Keep a low-temperature glue gun on a heatproof mat, out of reach, and open a window if you’re using epoxy.
- Glitter: Chunky glitter, not fine dust that blows into eyes. Spoon it in over a tray and wipe hands afterwards. Biodegradable glitter is a kinder choice if you can get it.
- Not a drink: A jar of water on the table can look like a drink to someone living with dementia. Keep the jug and glycerin with staff and label finished globes.
- Leaks: Check every seal the next day. If one weeps, dry it and run another line of glue around the lid.
Running it as a group session
Because the glue needs to dry, I split this into two short sessions. Day one is choosing and gluing. Day two is water, glitter and the big shake. Set one jar, lid and teaspoon per seat, the figurines in the middle, and the glitter, glycerin and water jug at the staff end of the table.
Suggested timing for a table of 6:
- Day one, 15 minutes: show the sample, choose figurines, arrange and glue
- Day two, 10 minutes: water, glitter and glycerin
- Day two, 5 minutes: staff seal the lids while residents tie ribbons and fill in gift tags
- Day two, 5–10 minutes: the first shake, then tea and a chat
Put on some soft Christmas music, White Christmas or Winter Wonderland, low enough that people can still chat. One carer or caregiver on the glue and one circulating is plenty for six. Keep a towel under every jar. Even careful hands spill a little water.
Snow globe ideas through the year
- Christmas and winter: Snowman, reindeer, mini tree or a little church with silver and white snow.
- Easter and spring: A chick or bunny with pastel glitter.
- Halloween and autumn: A tiny pumpkin with orange and gold glitter.
- Family celebrations: A wedding-cake couple or a small laminated family photo (laminate it well so it’s waterproof).
If something goes wrong
- Glitter sinks straight away: Add another teaspoon of glycerin and stir.
- Cloudy water: Too much glycerin or glue, or paint running off the figurine. Start again with boiled and cooled water and a plastic or glazed figurine.
- Figurine came loose: The glue wasn’t dry. Empty the jar, dry the lid, re-glue and leave it overnight.
- A big air bubble: Top up with water to just below the rim before sealing.
Chat while you craft
- Did you have a snow globe when you were young? Where did it come from?
- Have you ever seen real snow fall? Where were you?
- What souvenirs did you bring home from holidays or day trips?
- What was the best present you ever made for someone?
- If you could put any place inside your snow globe, where would it be?
- Who will you give your snow globe to?
Watch how it’s done
This short video shows the whole method from empty jar to first shake. It’s handy to play once on a screen before residents start.
Explore more
For another shake-and-watch activity, try our Calming Sensory Bottle for Seniors. More festive table crafts: Santa, Snowman and Elf Paper Chains and the Sock Snowman Craft. For more conversation starters, see our Christmas reminiscing questions, and browse the December calendar for the rest of the month’s ideas.
I’d love to see your snow globes lined up on a windowsill this December. Keep a box of clean jars and a pot of glitter in the craft cupboard. Once residents have made one, they’ll ask for it again next year.
Download your printable PDF copy of Snow Globe Craft for Seniors: Easy Jar Snow Globes (Free Printable)