This charming hands-on craft is a wonderful activity for seniors and a perfect addition to your programming in an aged care setting. It’s a simple, low-prep DIY that encourages fine motor skills and promotes social engagement. Residents will feel a sense of pride creating these interactive “living” paper pets—they are simple, visually striking, and provide a fantastic opportunity for lighthearted fun.
This simple paper craft uses a clever “hidden slider” mechanism that makes the cat’s eyes move whenever you touch its tummy.
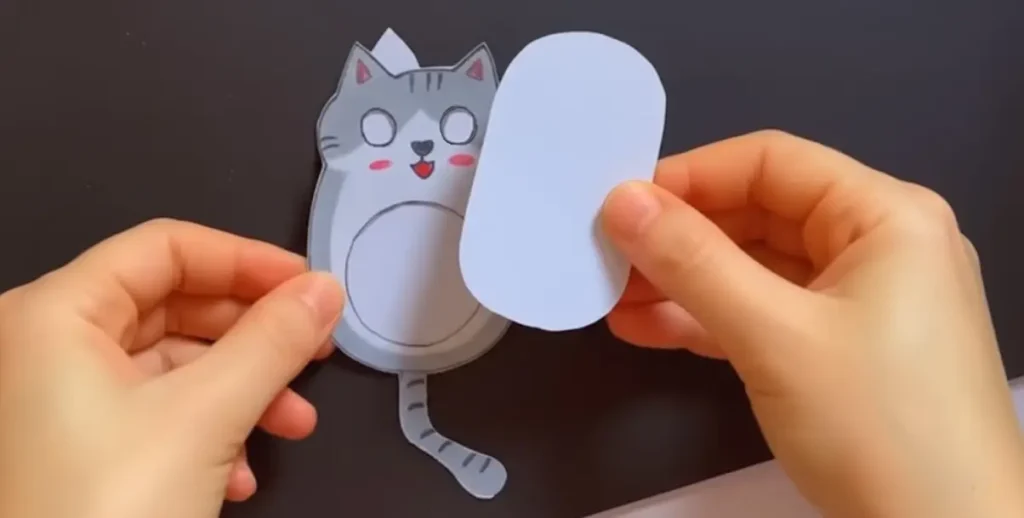
Video demonstration
This short video shows how the finished cat craft should look once it’s fully assembled. It’s intended as a visual reference for the final result, helping you see how the moving eyes appear and how the cat looks when completed.
What you’ll need
- Cardstock or thick paper for the cat base.
- Coloured pencils or markers to draw the face and details.
- Scissors and a glue stick.
Premium Member Exclusive: We have prepared a 2 version pre-cut template cat cutout ready to be printed below in the downloadable section.
- A Full-Colour Version – Ready to print and assemble immediately.
- A Black & White Version – Perfect for seniors to colour in and customise themselves.
- Detachable Paws & Feet – Extra cutouts to give your cat more character!
Log in or become a Premium Member to view the full materials list and enjoy more printable activities.

Step-by-step Guide
Step 1 – Prepare the Cat Base
Cut out the cat silhouette from the cardstock. Ensure the front piece has the circular “tummy window” cut out as shown in the template, as this is essential for controlling the eye movement. Take extra care to also cut out the eye holes on the cat’s face, as this allows the moving pupils to be seen from behind.

Step 2 – Decorate Your Character
Use markers or pencils to color in your cat. Seniors can customize their pets with unique stripes or patches, providing a wonderful opportunity to share stories about their own past pets.

Step 3 – Create the Eye Slider
Take the small rectangular paper strip and draw two bold black dots for the pupils. This strip will sit behind the head area and reach down to the tummy window for easy control.
Step 4 – Glue and Assemble
Apply glue only to the outer edges of the cat’s body. It is vital to leave the center and head area glue-free so the eye slider can move freely between the paper layers. Sandwich the slider inside and press the edges firmly.

Step 5 – Make the Eyes Move
Once the glue is dry, place a finger on the paper visible through the tummy window and slide it around. Watch as the cat’s eyes follow your movement in every direction!

If you liked this activity, you may like these also:
Looking for more creative ways to engage your residents? If you enjoyed making the Moving Eye Cat, check out these popular crafts:
- Pet Rock Cactus Art – A fun, tactile project creating bright, maintenance-free greenery using smooth stones.
- Paper Cup Dress Up Doll – A nostalgic and interactive craft that encourages creativity and reminiscing about fashion.
Become our Premium Member to download Easy DIY Moving Eye Paper Cat: Craft Activity for Seniors
This download is only available to premium members, unlock a world of exclusive content designed to enhance your caregiving journey. Become a member today!
CAD $54.02/ Year
30 days money-back guarantee. No question asked.